TML 2021 #02: Expanding on Research
by fingerplayers
This journal is an entry in The Maker’s Lab series. Click here to read the previous entries.

Prototyping begins! To start with, I am making a harness to mount the puppet on. This will be the basic design block to expand upon to become a wearable device that helps the performer when manipulating large objects.
Prototype Make
- Went with a costume-making process:
- Draft a basic bodice block.
- Add ventilation holes to paper pattern.
- Sew a calico toile.
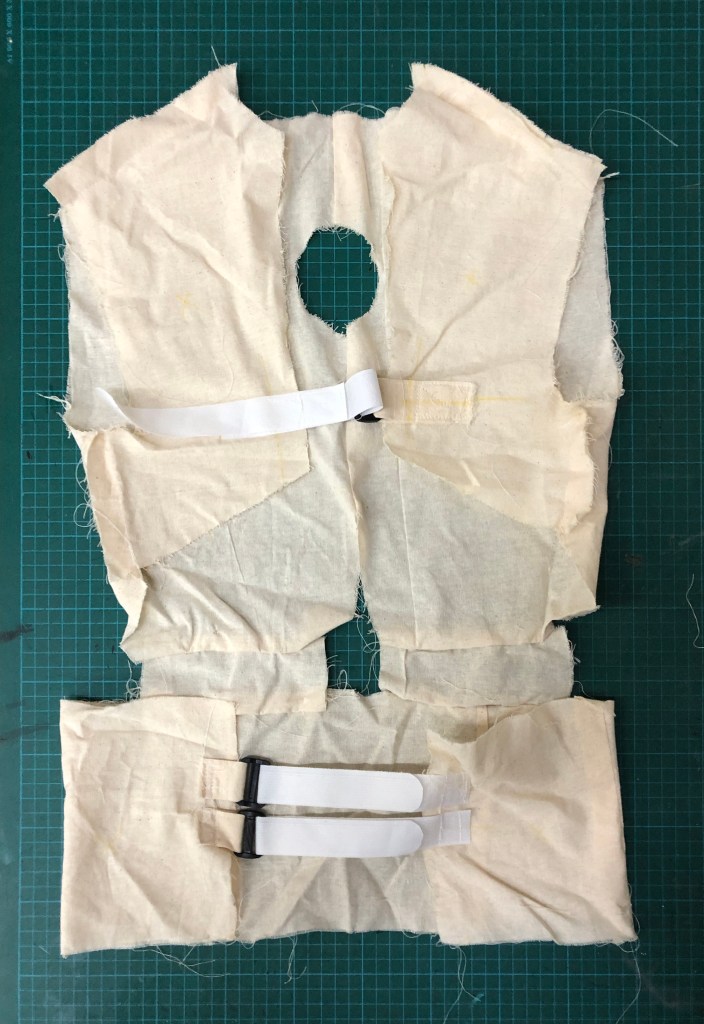
- Tried it on and perspired just by sitting around so I removed more covered areas.
- After removing all unnecessary material it is looking like a bunch of straps.
- Padded the straps with yoga mat for comfort.
- Added velcro to allow the harness’ fit to be adjustable.
- Anticipated strap adjusters on nylon or cotton straps to slowly slip loose over time, and went with velcro straps.
- Anticipated strap adjusters on nylon or cotton straps to slowly slip loose over time, and went with velcro straps.
- Added a pocket on the back strap for the long-arm structure to sit and a shackle to lock it in place
- To cut the time needed to build a new puppet, I decided to use my previous giant wing puppet that I built for TFP’s Peepbird.
- Conceptually, I am interested in long-arm structures and not just wings.

Prototype Testing
- First round of checks: wear it myself to feel how the weight distributes.
- The harness is well and fine on its own but a struggle to adjust with the long-arm structure in
- The harness is well and fine on its own but a struggle to adjust with the long-arm structure in
- Second round of checks: lure an unsuspecting human (Daniel) to wear the harness while I look for areas that are straining.
- Also received feedback that connecting the long-arm structure to the opposite thigh might help redistribute its weight.
- Also received feedback that connecting the long-arm structure to the opposite thigh might help redistribute its weight.
- Third round of checks: enter Puppeteer Consultant, Oliver Chong!
- Had a 2-hour session with Oliver to try out the harness and long-arm structure
Puppeteer Consultant Session #1
We tested the harness and long-arm structure in various configurations. The two movement exercises we tried were – (1) character hatching from egg and (2) character hunting.
Order of events:
1. Tested the harness with long-arm structure behind:

- Tested the long-arm structure without harness:
- Tested the harness with long-arm structure in front:
- Tested the harness with long-arm structure behind again
Oliver’s interactions with the long-arm structure really highlighted the beauty and freedom of the human touch in puppetry. So far, I have been engrossed in reducing the object’s weight borne by the puppeteer while neglecting the control and manipulation of object.
Unexpectedly, placing the long-arm structure in front instead of behind the body is the best option for this version as
- There are less obstacles blocking the puppeteer’s dominant arm.
- Structure can be seen in peripheral vision compared to when it was mounted behind.
- Where structure is mounted acts as a fulcrum and allows structure to be manipulated with shoulder movements.
On the harness itself, I learnt that
- Wearing it extremely tightly gives the most control.
- Velcro straps should account for human body’s curvature.
- Large stitch length (so as not to tear padding) on shackle’s loop resulted in sewing coming almost undone at end of session.
Moving forward
Next, I will
- Mount these structures on the hip and cater for mounting on both left and right sides.
- Mounting on the hip to transfer weight from shoulders to the hips.
- Left and right mounts for symmetry.
- Add thicker padding to straps.
- The current single layer of yoga mat still allows long arm structure to dig into puppeteer’s meat.
- Create more variations of long arm structures and overhead structures for different puppets.
- To build a library of structures for future puppets.
This article is a monthly reflection by Loo An Ni, the maker of The Maker’s Lab, as part of an ongoing 9-month experimental laboratory. The Maker’s Lab is curated and managed by Daniel Sim, a core team member of TFP. The ideas and reflections within the article are drawn from An Ni’s observations and discoveries as a maker, designer and researcher. Instead of being taken as conclusive, we hope that they serve to be a starting point for thought-provoking conversations and perhaps even debates.
We would love to hear from you and can be reached at tfpmakerslab@gmail.com.
If you wish to follow An Ni on her journey with The Maker’s Lab, click on the ‘Subscribe’ link below now!